Geofencing helps when sensors are placed in enclosed spaces like meeting rooms. Since sensors rely on line of sight, any detections outside the room are likely inaccurate. A geofence ensures only sightings within the space are considered.
There are two ways to set up geofencing: auto-geofence and manual. Auto-geofencing requires some initial setup.
Auto-Geofencing
Instead of manually drawing geofence boundaries for each sensor, auto-geofencing uses details about the sensor’s location to create them automatically. Marking a space or space type as IsEnclosed helps define the area where auto-geofencing applies.
Setting up IsEnclosed for a space type
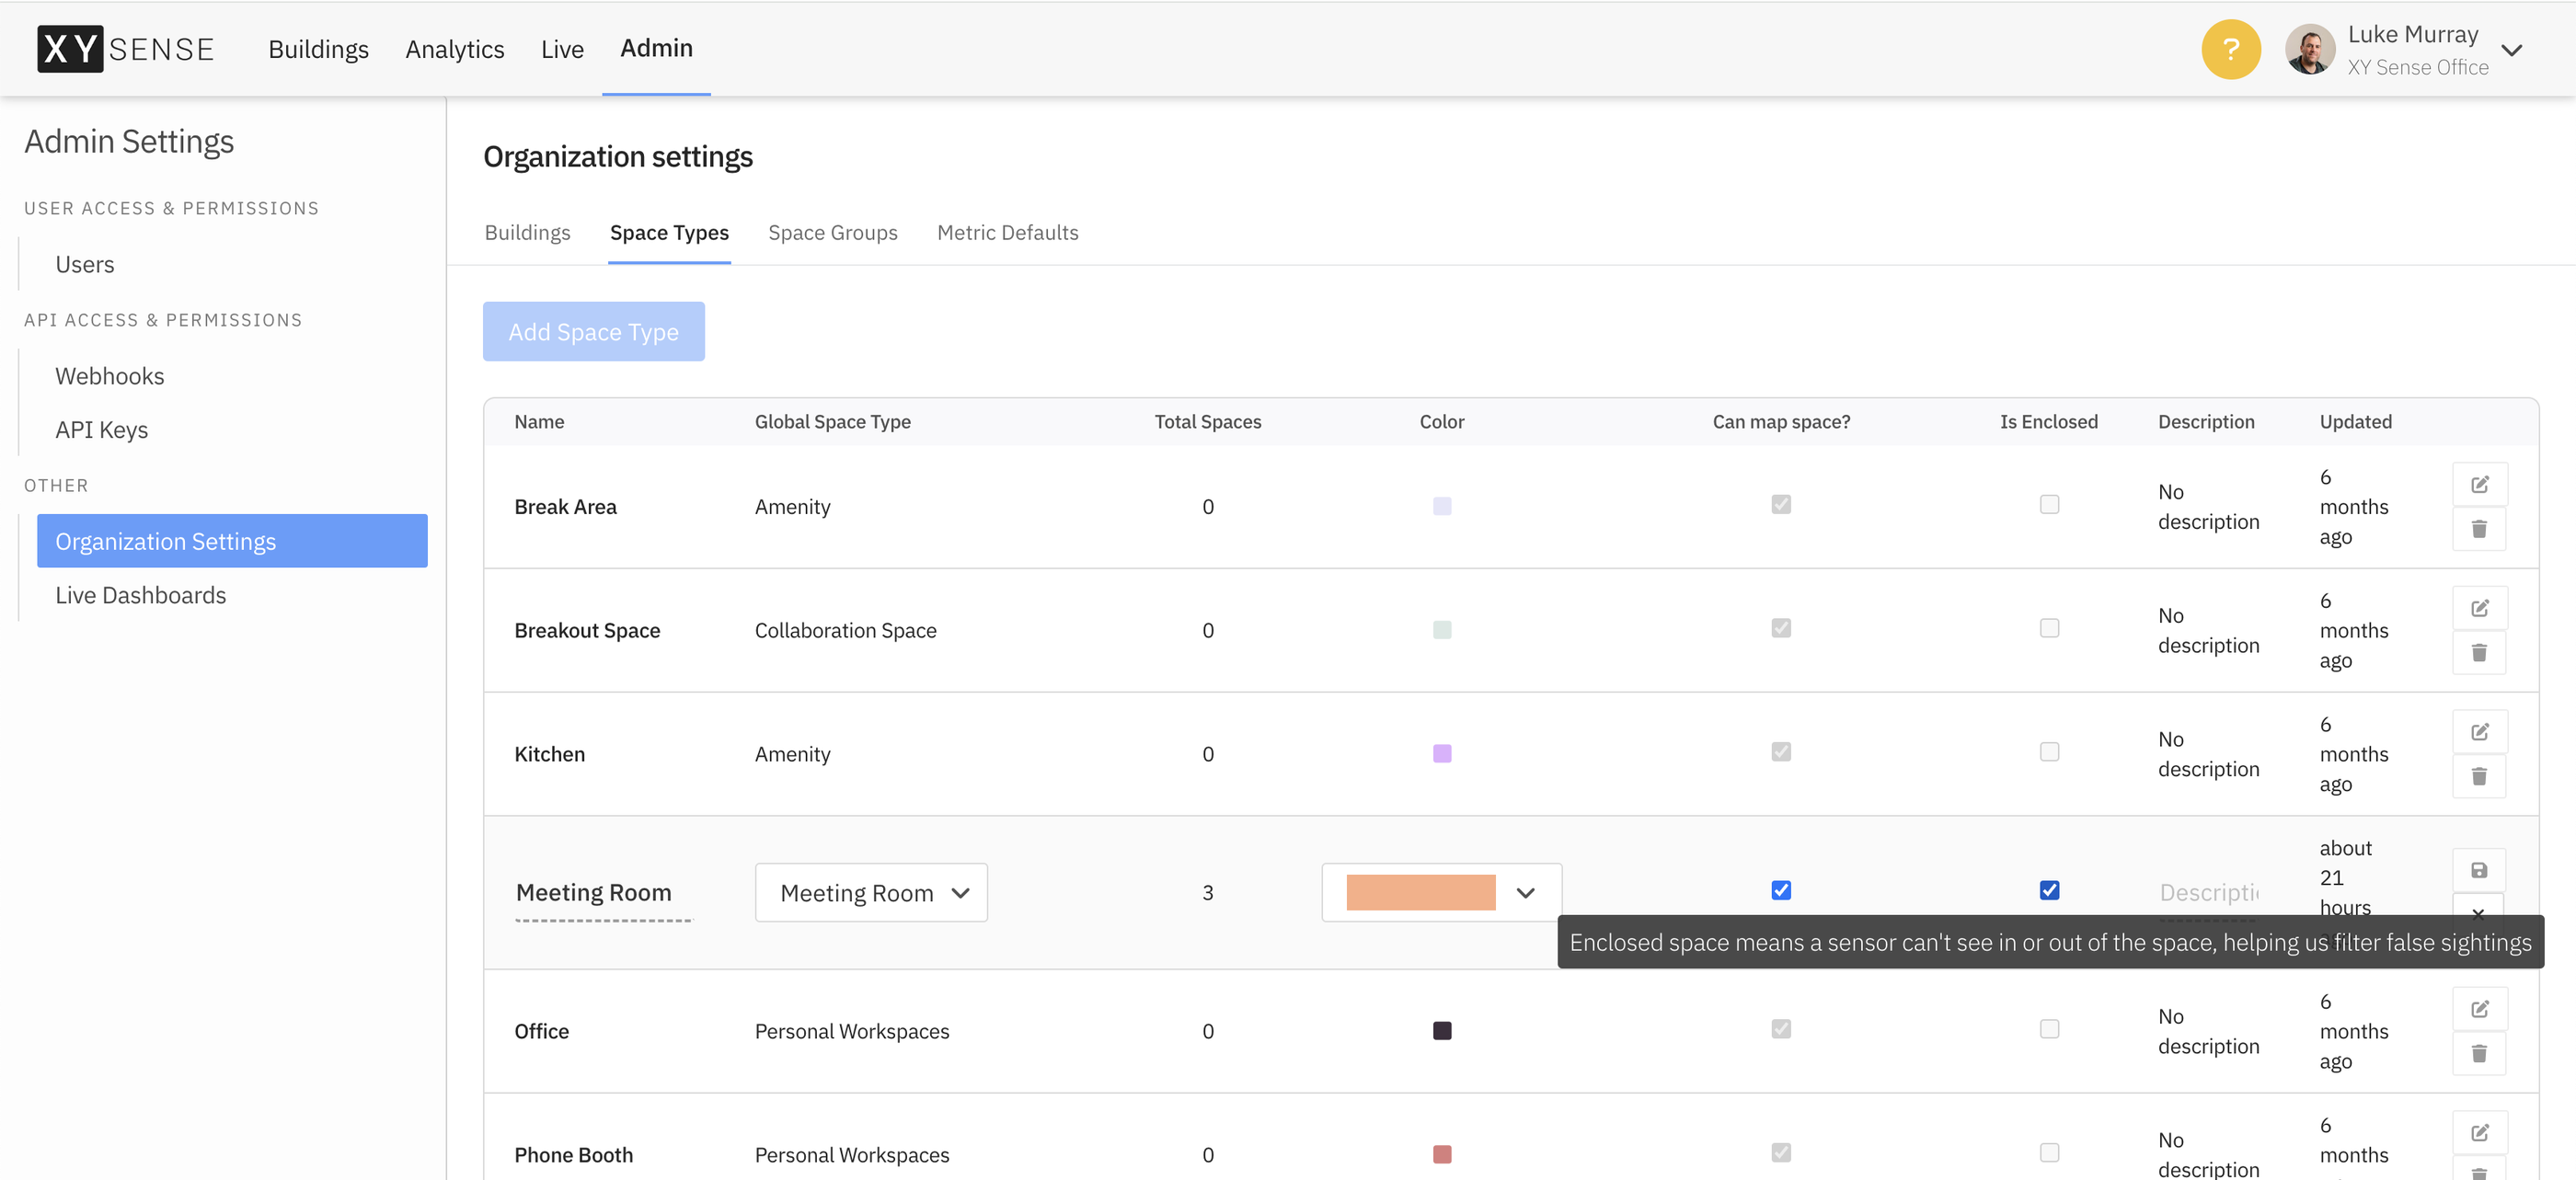
In Admin → Organization Settings → Space Types there is a new column Is Enclosed?. This indicates whether a space type is enclosed, meaning it has solid or artificial walls. By default, all spaces of this type will be marked as enclosed unless manually changed at the individual space level.
Setting upIsEnclosedfor an individual space
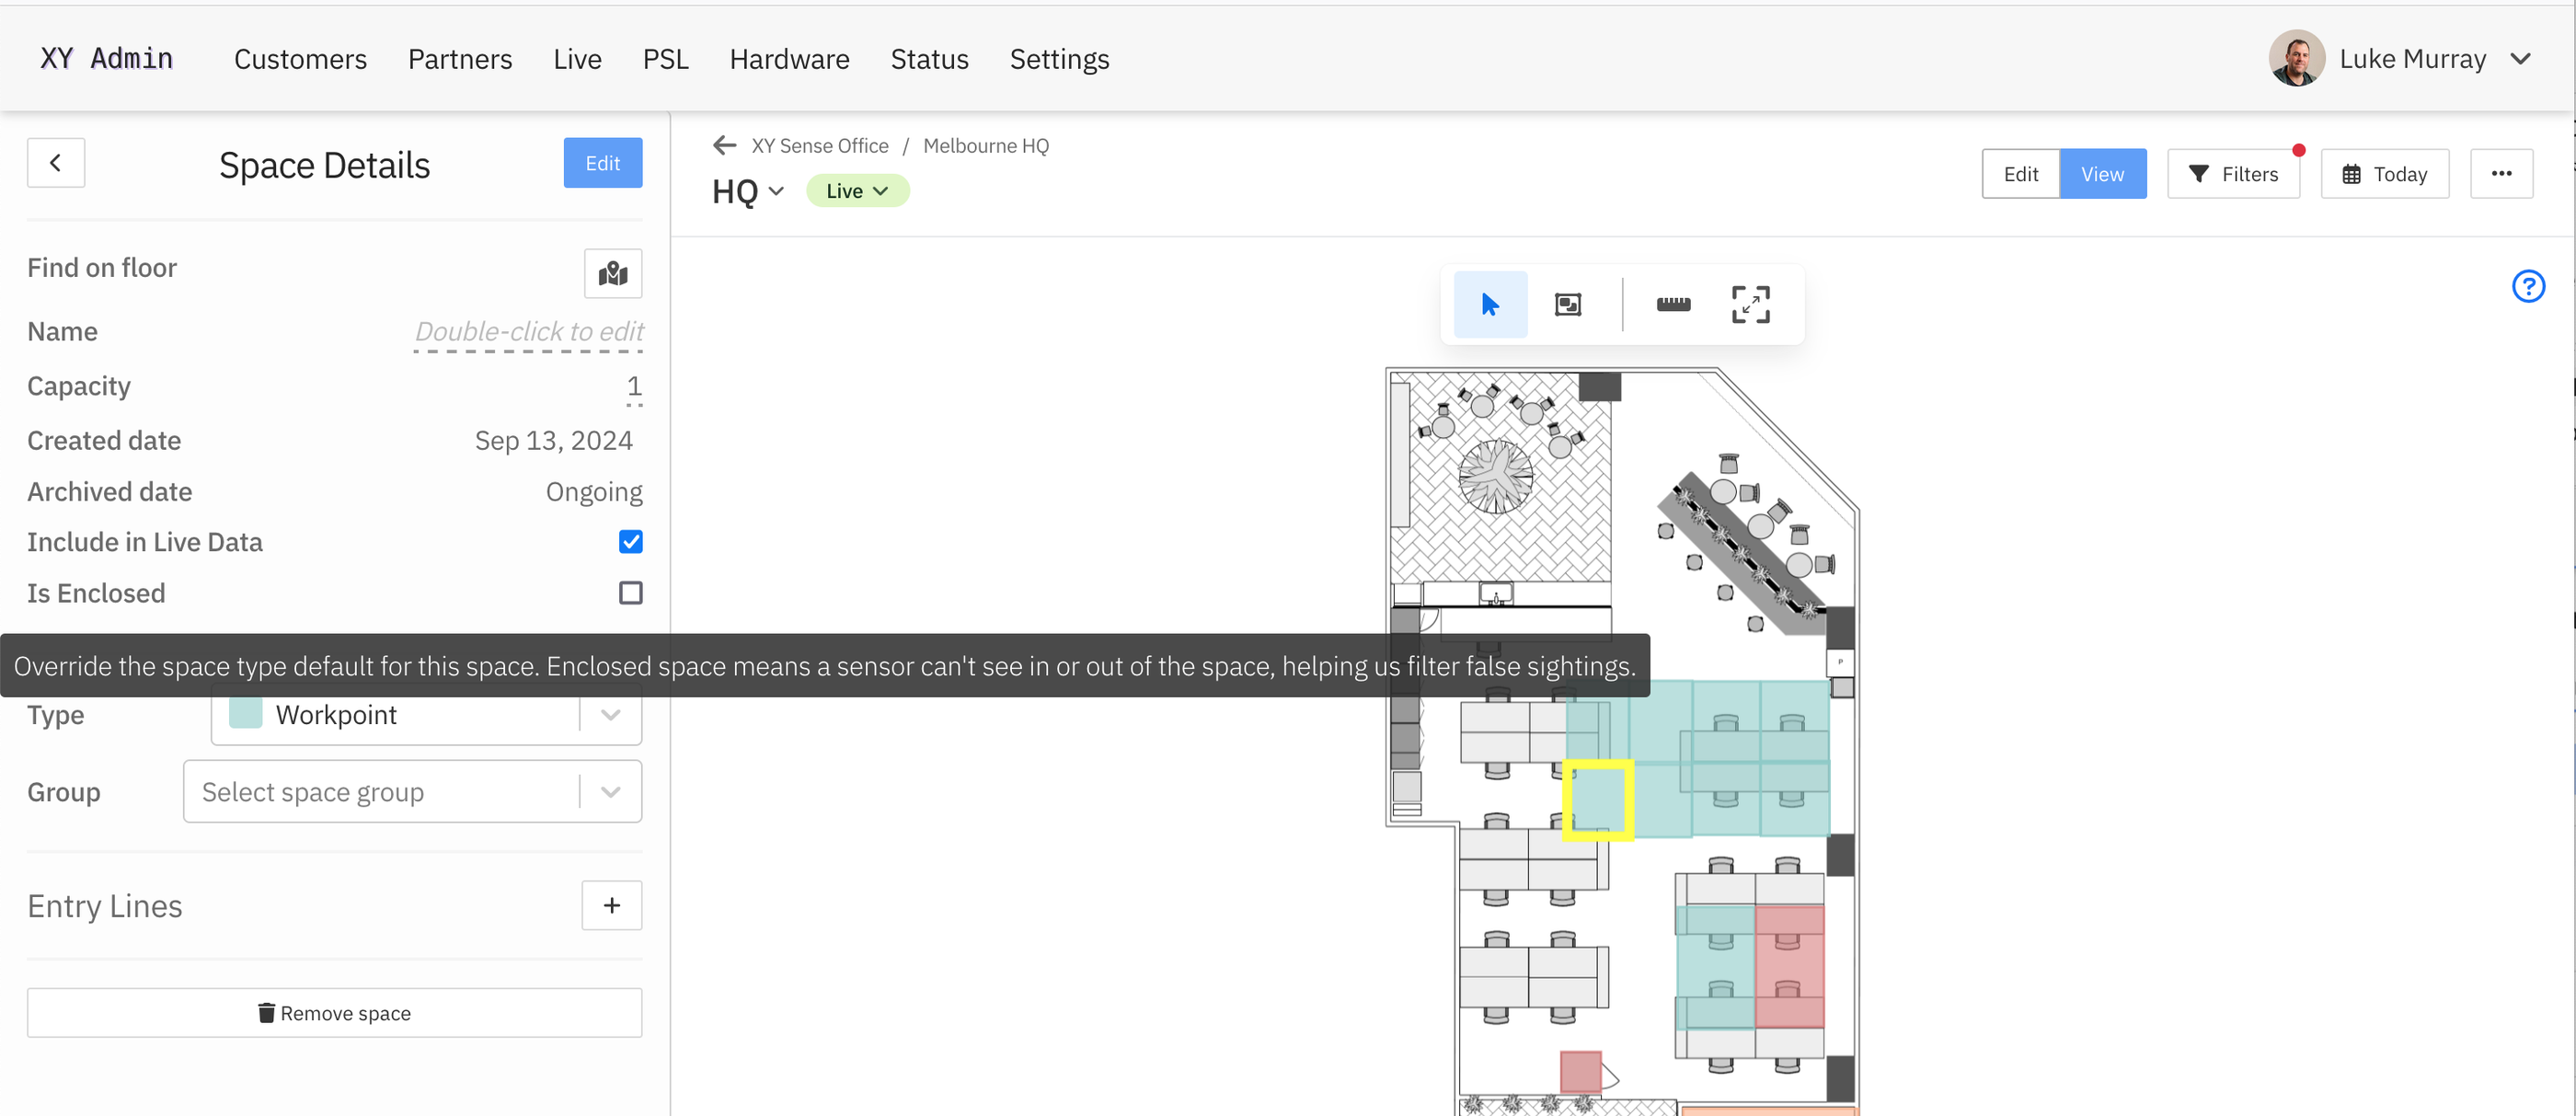
In Space Mapping, you can mark an individual space as enclosed or not. overriding the default space type setting. This might be useful if we are using Area sensors to see out or into areas through glass walls on a space type that is marked enclosed by default.
How it works
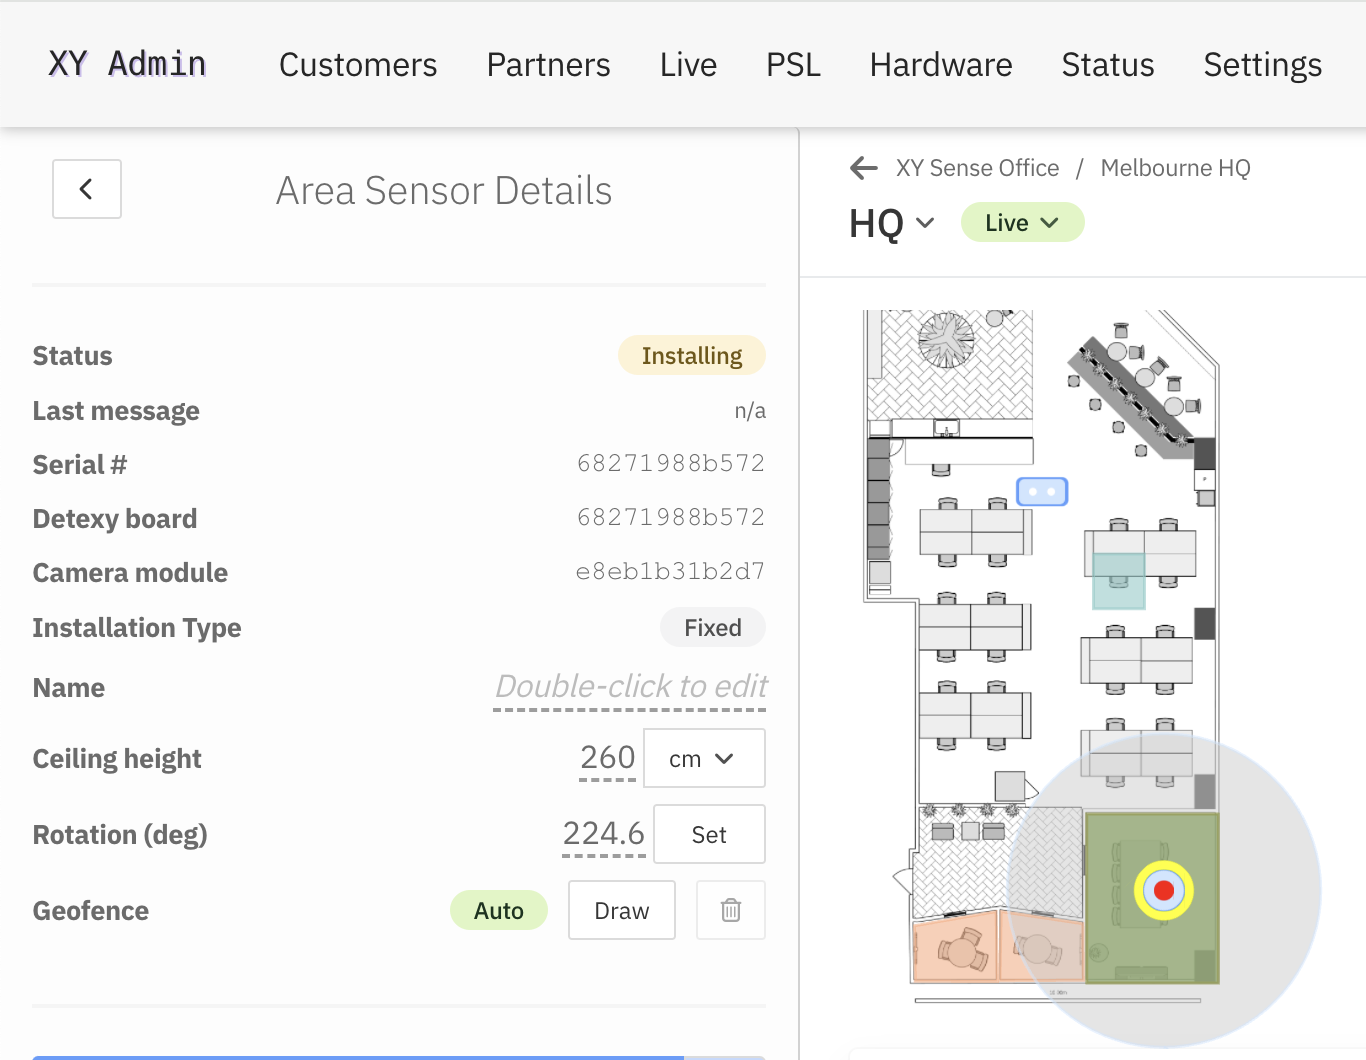
If an Area sensor is positioned within a space that has IsEnclosed enabled then sightings from that sensor will be filtered as if the geofence was the shape of the space.
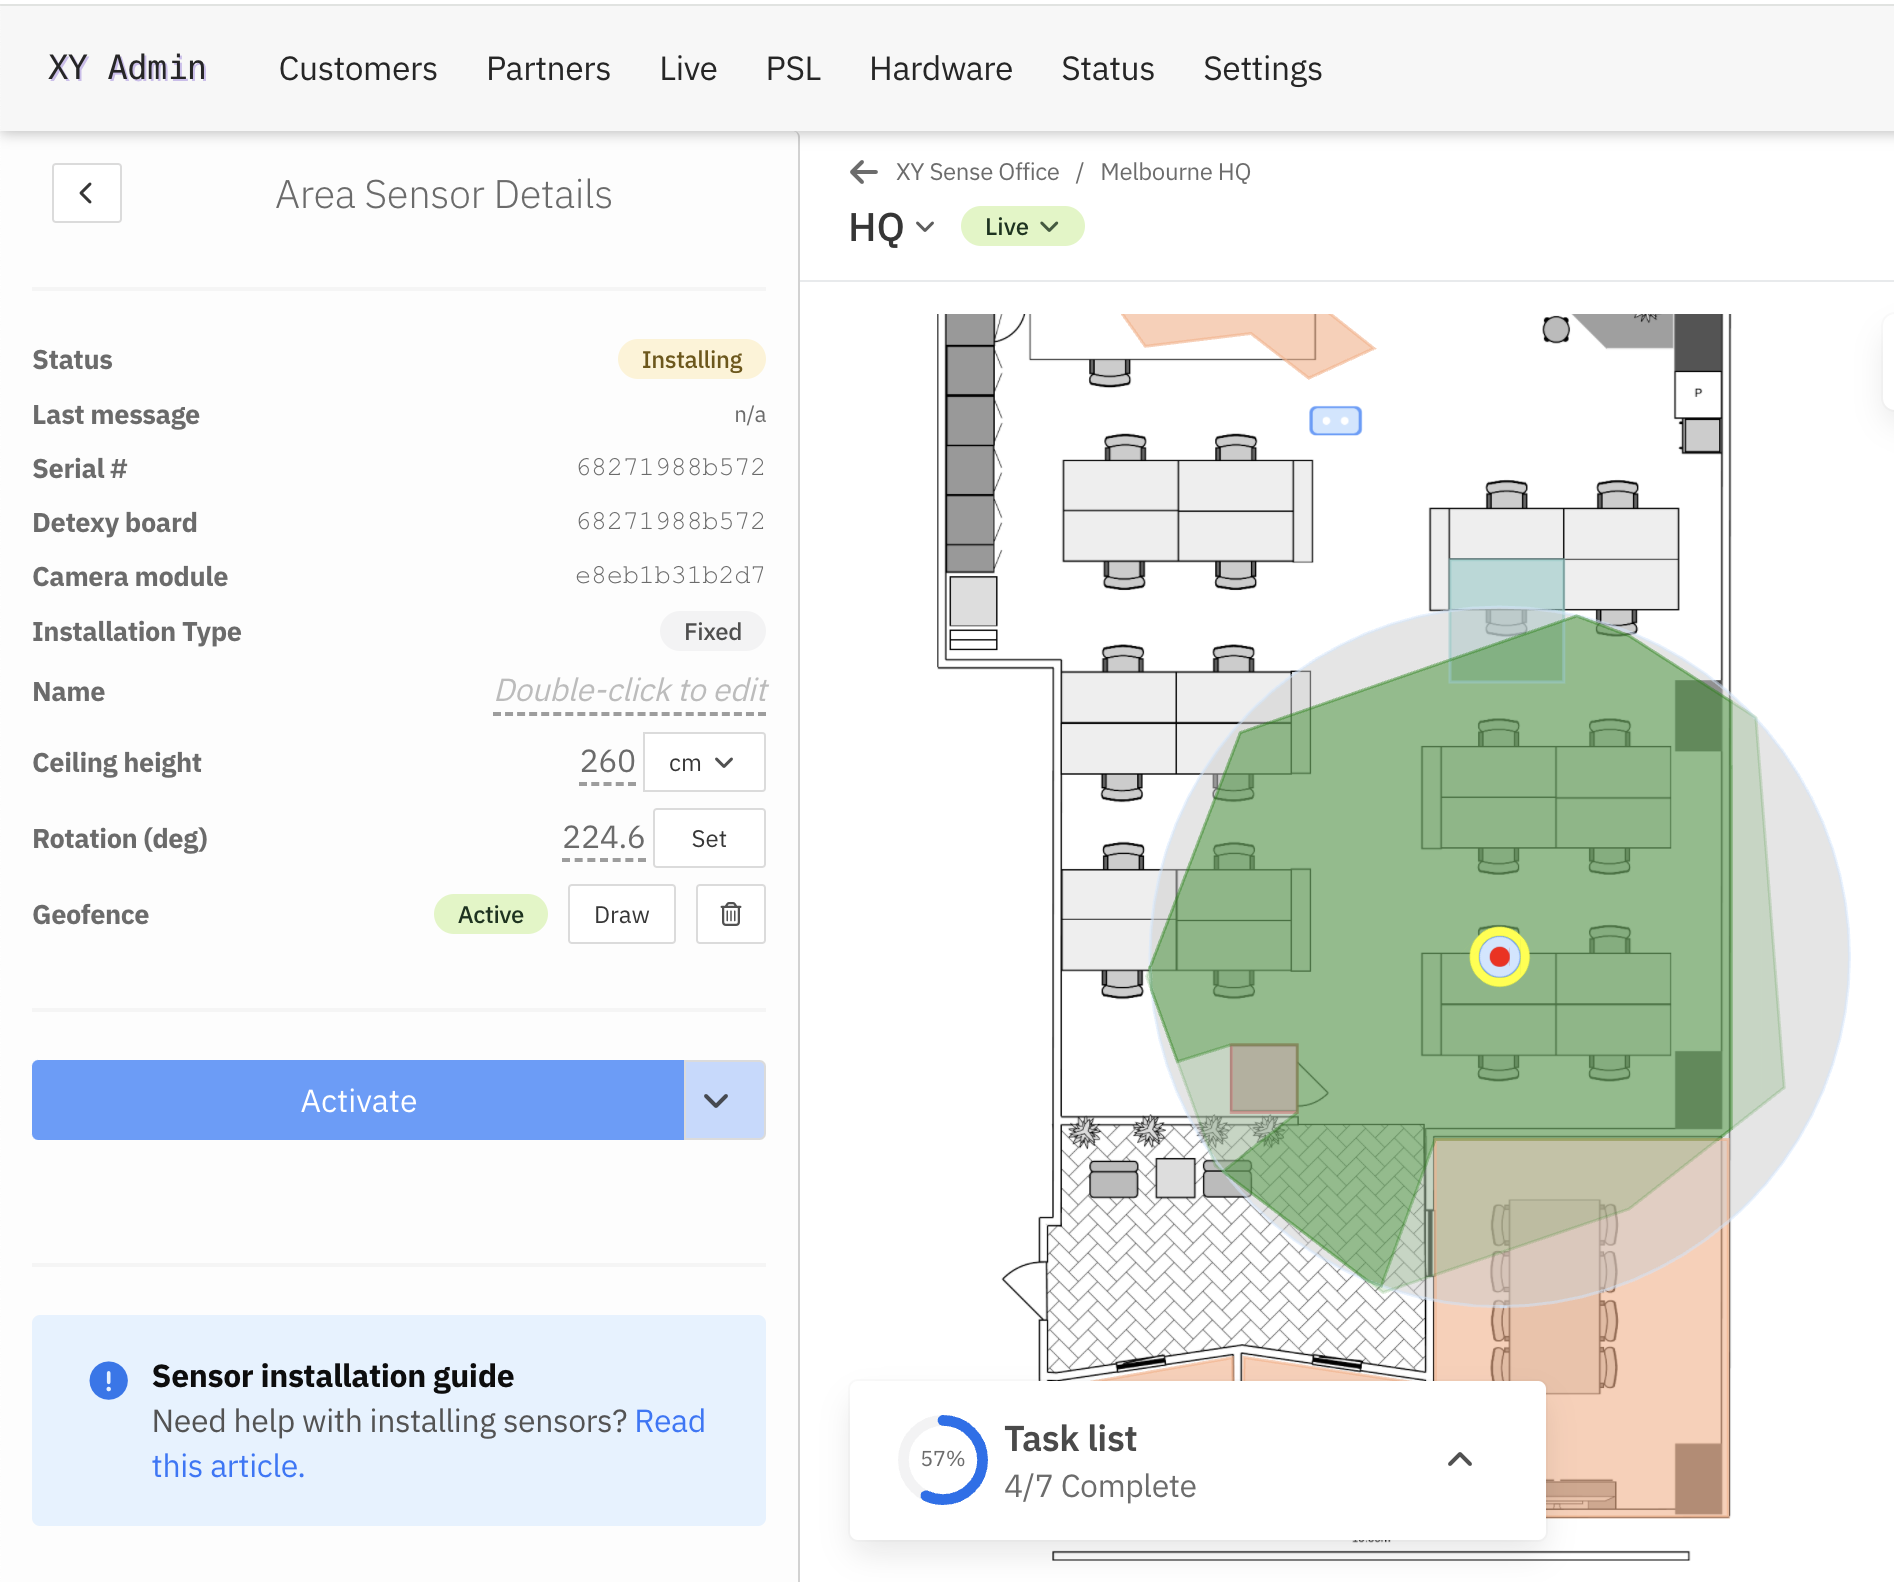
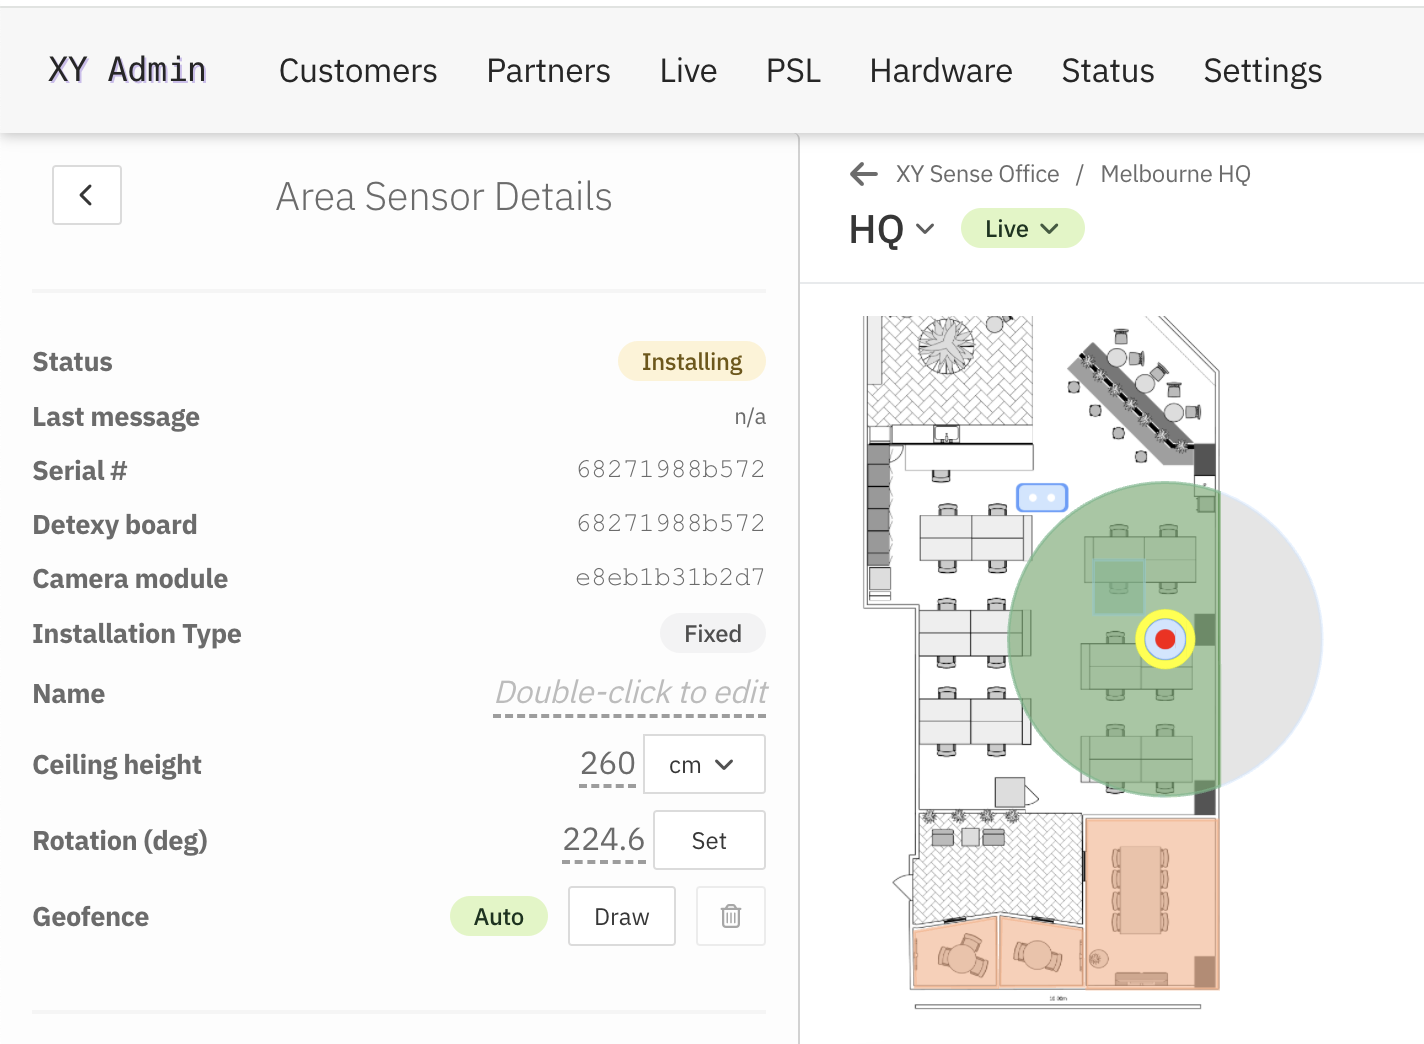
This will be shown in the sensor installation page as Auto in the Geofence section on the side panel and the auto geofence (visualisation of line of sight) shape will be shown (same shape as the space it is located in).
If the area sensor is not within the space that space will be used to filter out sightings on the other side of it - i.e. we know the sensor can't see past the object.
The above gif shows the field of view of the sensor based on the known enclosed spaces.
Manual Geofencing
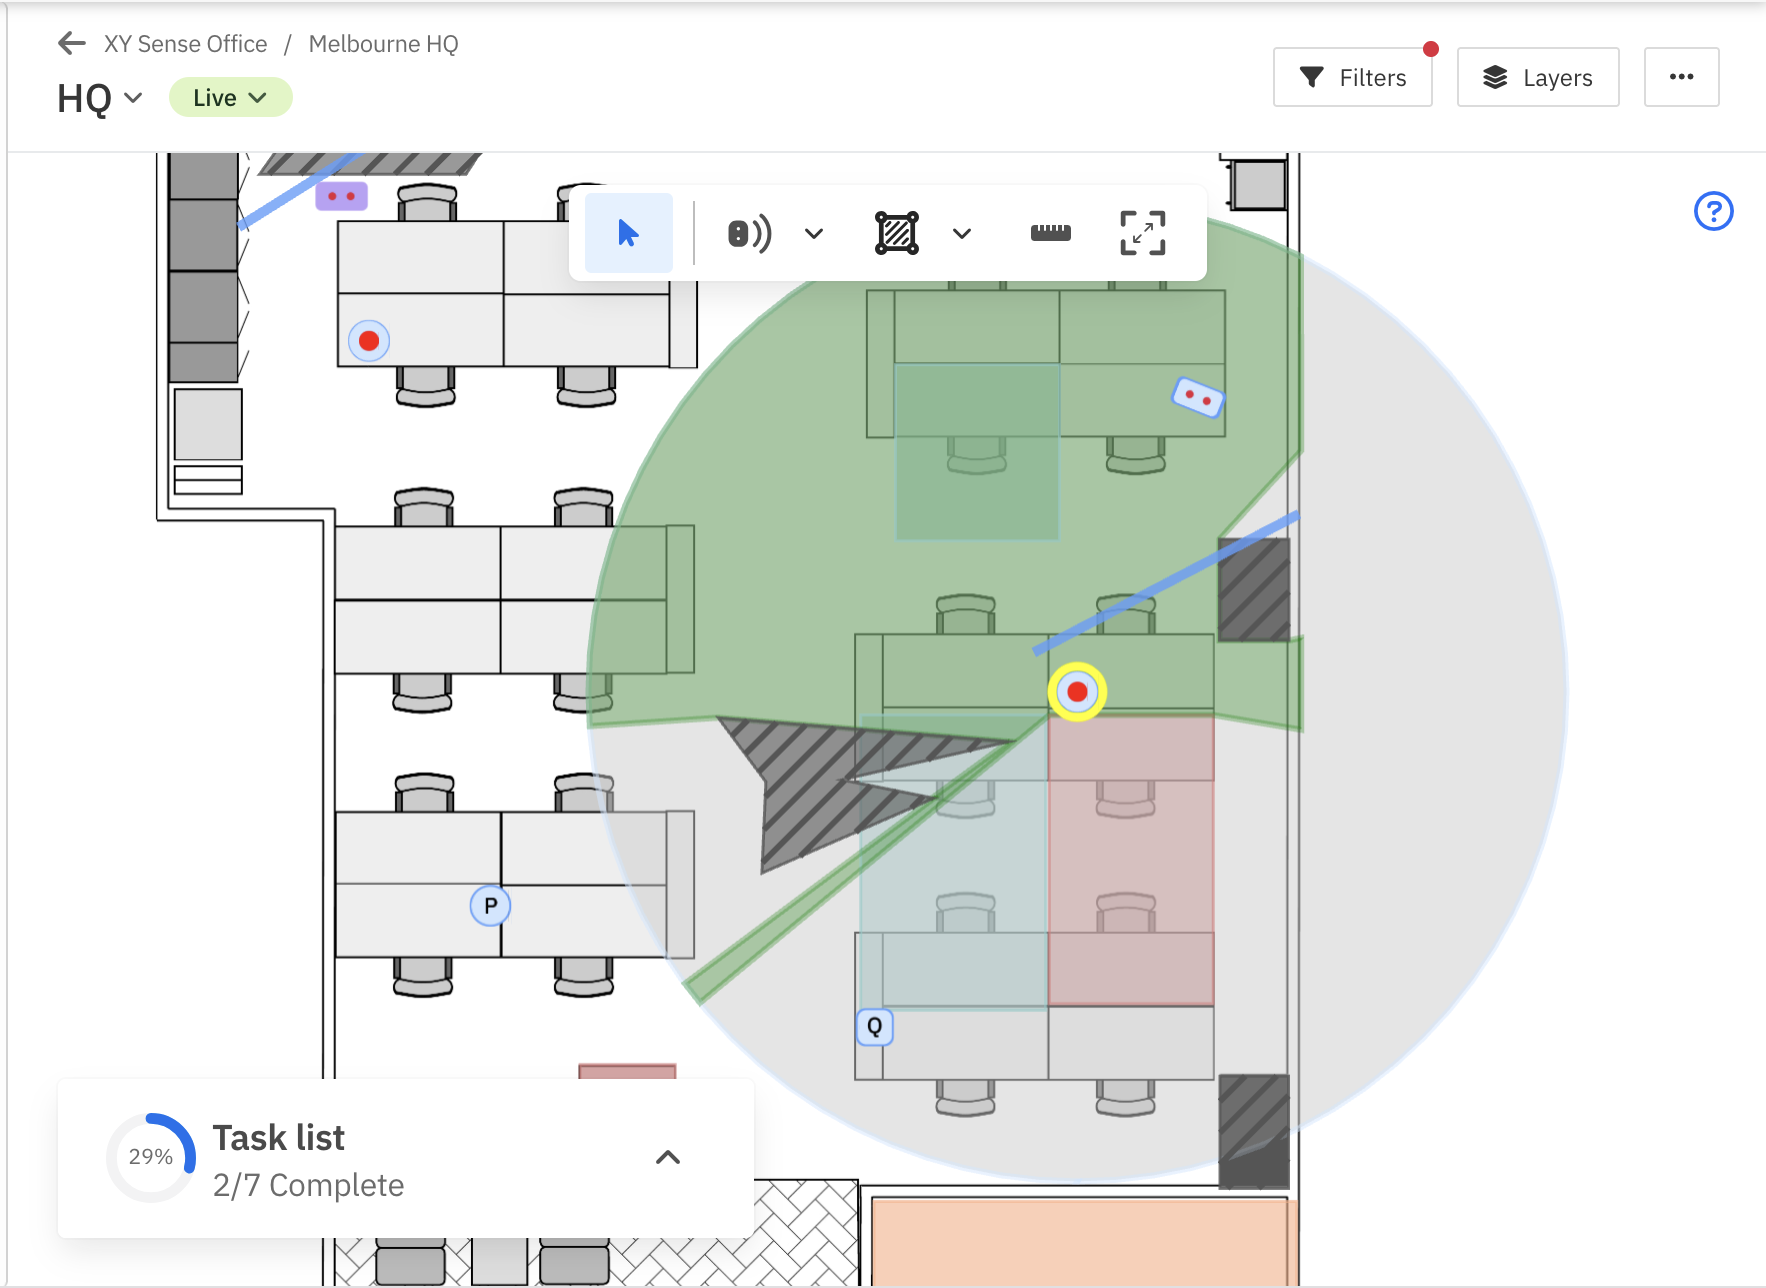
If a sensor has a geofence defined that shape is used instead of the space's shape, however line of sight obstacles are still taken into account. Below shows the geofence as light green, but the actual visible/line of sight area as darker green.
- To apply a geofence, follow the instructions below:
- Click on settings button for your floor → "configure sensors" (alternatively, add "/sensors" to your currently website url.
- Click on a sensor → deactivate if activated → click "draw" next to "Geofence" and follow boundaries of the space/sensor coverage → reactivate sensor
Enclosed space geofencing
- Sensor geofencing is also useful when sensor coverage extends beyond the boundaries of the floor (see Fig 4. below). Sightings can often appear on/around windows due to reflections, resulting in "floating sightings" appearing outside the floor.
- Follow the steps outlined above to geofence only the sensor coverage that falls within the floor
Sensor geofrenced for floor boundary
Multiple Spaces
If an Area sensor's location is on multiple spaces (and without a manual geofence) it will result in only sightings from the intersection of those shapes being kept.
For example if the Floor & Meeting Room space types have auto geofencing enabled. Provided the meeting room in fully contained within the floor shape, a sensor located over the floor shape and the meeting shape will ultimately filter out all sightings outside of the meeting room.
Floor space
If a floor space is drawn and has IsEnclosed enabled, this means any Area sensor within the floor space will have sightings outside of the floor filtered. Meaning reflections out the windows will be removed.
Floor Masks & Structures
We can also draw shapes on a floor plan, which relate to the floor plan not the sensor (unlike a geofence)
- Masks - Sightings within these shapes will be ignored but the sensor can still "see" past them
- Structures/Line of obstructions - sightings in these shapes and past them from a sensors line of sight will be ignored
Mask example - TVs etc in meeting rooms
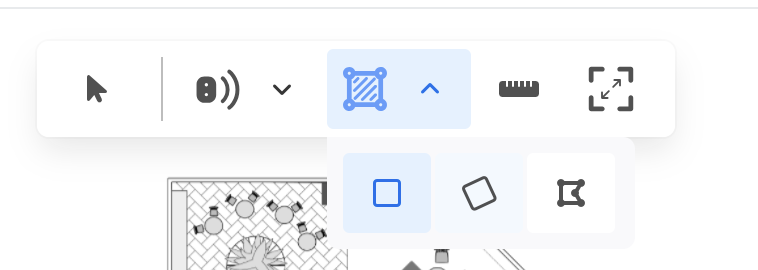
If a TV is an issue we often draw a geofence in the room that excludes the TV. This is still a requirement today with auto geofence/enclosed spaces. You can use the mask tool (highlighted below in blue) to create an obstruction.
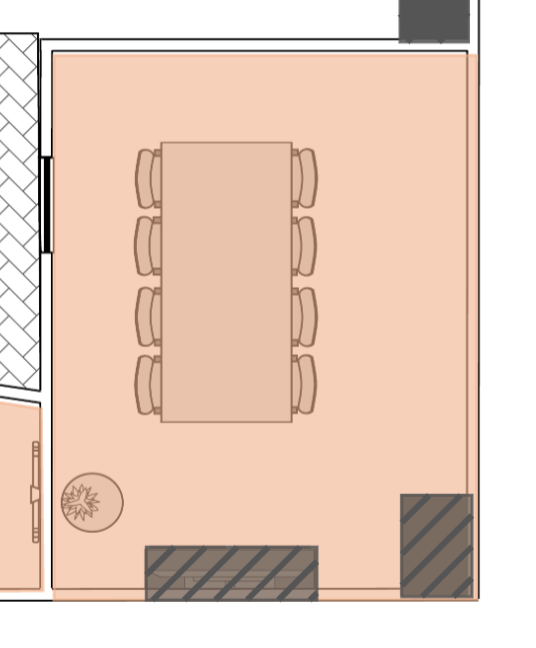
Floor Masks let you draw zones on the floor where sightings will be filtered out. Below is an example of masks drawn in a room (the dark, hatched boxes)
Line of sight obstructions
Line of sight obstructions are treated as a physical object that sensors cannot see through. Therefore any sightings that appear on the other side of it will be filtered out. These could be walls, pillars etc. Obstructions will be used to visually show a sensors actual coverage area as below.
Comments
0 comments